

Wells Help Page
Well List
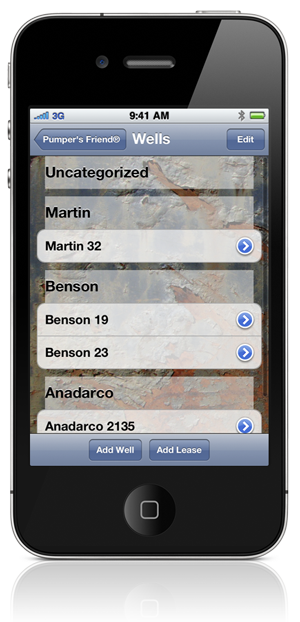
The well list is where you keep track of the gauge readings of wells you service. Each well is listed by name and additional wells can be added by selecting the “Add Well” option. The wells are organized by leases so you can easily keep track of them.
If you select the “Edit” button in the upper right, you can delete or remove a well from the list. By using the control on the right of each row, you can rearrange the rows as needed.
When a well is added it is placed in an “Uncategorized” group. In order to associate a well with a lease, you must move the well to the proper lease using the edit feature. As a convenience, you can add a lease from the Well screen by selecting the “Add Lease” button at the bottom.
By selecting the “arrow” button, you can update the information for an individual well.
Well Gauge List
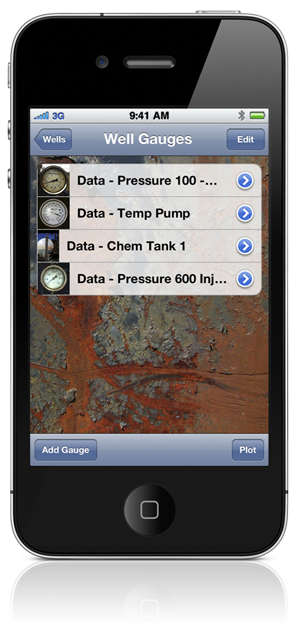
Each well can have multiple gauges associated with it. By touching the well name, you will be taken to the “Well Gauges List” for that well.
The well gauge list is where you keep track of the all the gauges for the selected well. Each gauge is listed by name and additional gauges can be added by selecting the “Add Gauge” option.
By selcting the “arrow” button, you can update the information for an individual gauge. If you select the “Edit” button in the upper right, you can delete or remove a gauge from the list. While in edit mode, you can also rearrange the guages by using the control on the right side of each row.
Add & Update Well Information
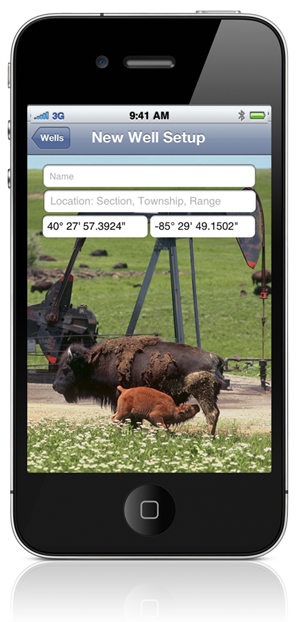
If you select the “add well” or the “arrow” button beside a well name, the setup screen is displayed. This screen allows you to add or modify well information.
The name field is always required, and the location information is optional.
Data & Plot
These two options allow you to either gather gauge data or plot gauge data for the individual gauge selected.
At the bottom of the screen is a button labeled “Plot.” If you touch the button, you will notice that the word “Plot” appears in front of each gauge name, and a plot icon appears, indicating plot mode. In this mode, when a row is selected, a data plot will appear for that gauge
If the “Data” button is visible, touching it will place the mode back into data mode, showing a small image of the gauge When a row is selected in the data mode, The specific gauge screen will appear.
Add & Update Gauge Information
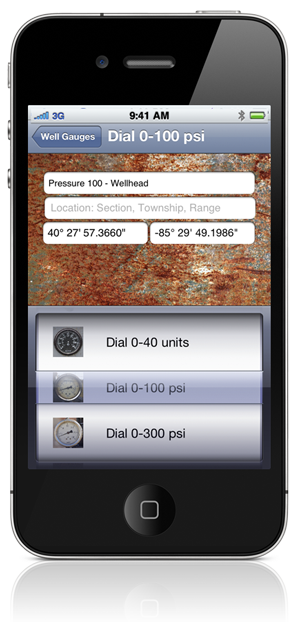
If you select the “add gauge” or the “arrow” button beside a gauge name, the setup screen is displayed. This screen allows you to add or modify individual gauge information.
The name field is always required, and the location information is optional. The type of gauge desired is selected from a “picker.” With your finger you can rotate the picker selection until the desired gauge is shown under the transparent selection bar. There are a variety of gauges to pick from that are similar to common field devices. If the gauge you wish to use is not pictured, please contact us.
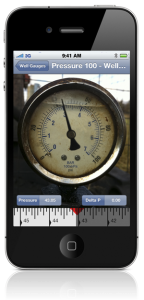
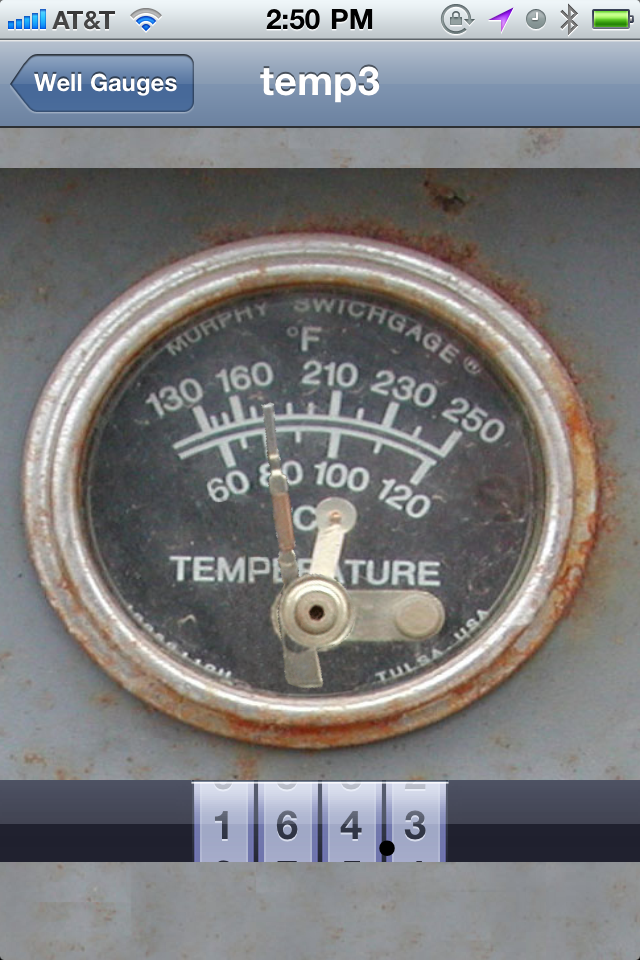
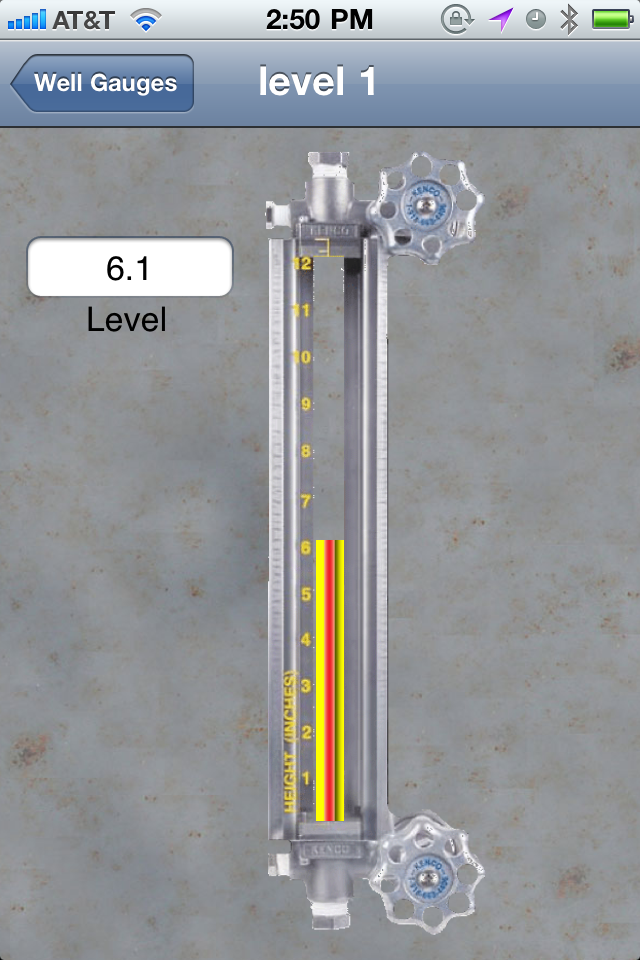
Collecting Gauge Data
The touch screen user interface makes data collection simple. In the case of a dial gauge, move your finger around the dial, and the indicator will follow. The actual numeric reading is displayed. For this particular gauge, you can drag you finger across the ruler at the bottom to fine-adjust the reading. The red triangle shows the reading from the previous setting for comparison purposes.
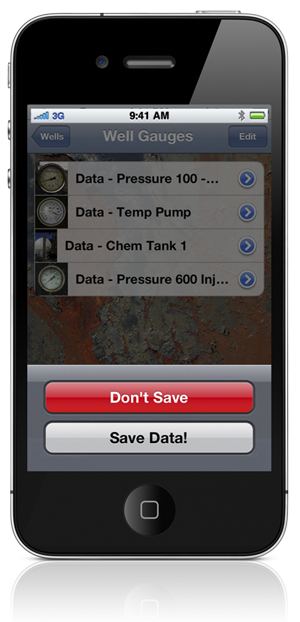
Saving Data
Whenever you leave a gauge screen, you have the option to either save, or discard the data.
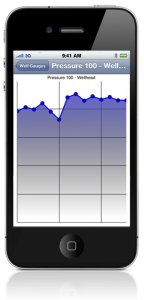
Gauge Plot
The gauge plot displays the data collected from each gauge reading. At a glance, you can see the daily levels, and determine if the readings are normal.
The graph can be moved and scaled with finger gestures for viewing specific areas in more detail.
Gauge Types
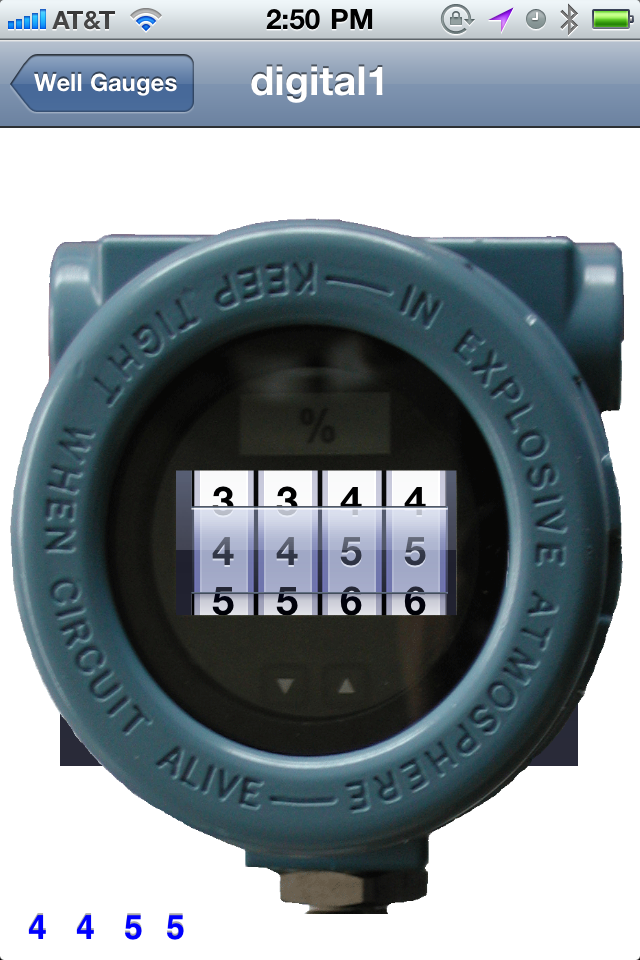

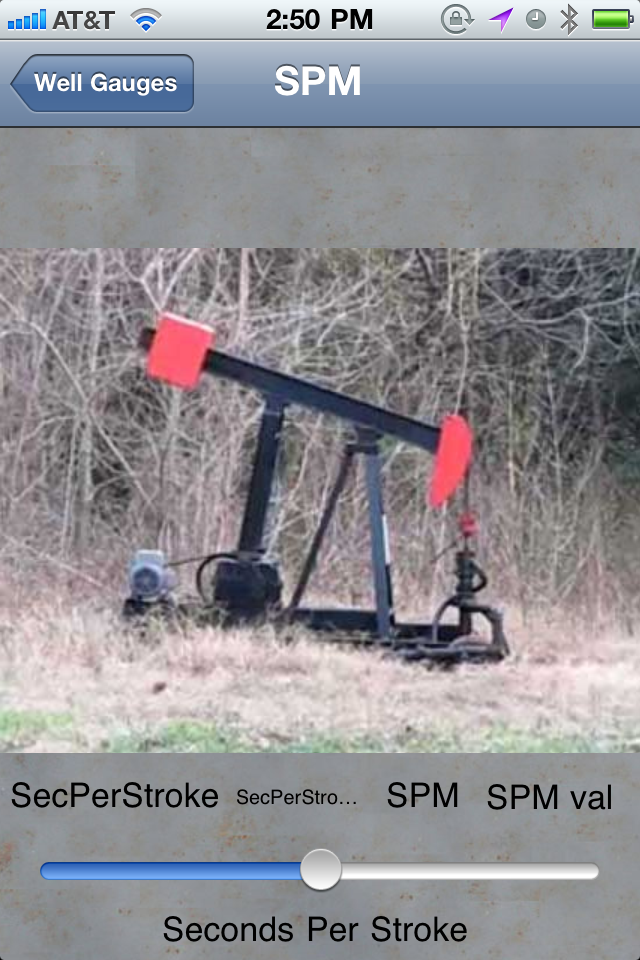
There are a variety of gauges to choose from, and more will be added as time goes on. Each gauge features the ability to enter data by touching the screen and moving the indicator to the desired position. When you return to the previous screen, the data is saved.